A heartfelt ‘thank you’ to Donna Purcell, Sarah Hayes and Lisa Le Van for generously sharing their expertise in human rights and in education for people with disability.
Last month I facilitated a Train the Trainer program with a cohort that included people with vision and hearing impairments. These individuals are also experts in human rights for people with disability and are keen to share ideas about what we facilitators can do to ensure learning events work for all participants. They have invited me to share these ideas, and hope you will share them with others in your network. So please help us spread the word!
Here are their suggestions:
Get started
When in doubt, ask!
The single most effective way to ensure that a learning event works for participants with disability is to ask them what they need to make the event work for them, then find ways to meet these needs.
The client for my Train the Trainer program gave me four weeks’ notice that I would have attendees with vision and hearing impairments. Of the cohort of 12 participants:
- two had vision impairments
- two had hearing impairments.
Having this information ahead of time was essential, as it gave me time to prepare how I would adapt activities and materials.
Don’t assume – ask each time!
Each participant has their own unique combination of experiences and learning preferences. The same is true of participants with disability.
There is no one-size-fits-all way to address the learning needs of participants with disability. For example, even though I had participants with vision impairment and two with hearing impairment, on my Train the Trainer program, each individual had their own preferred ways to engage in the learning.
Facilitate accessible learning
Don’t single out participants with disability
Don’t single out participants with disability in front of others. Instead, find a private way to:
- ask them what they need from you to make the learning work for them
- invite them to give you feedback and suggestions at any time throughout the learning event and be prepared to continually adjust activities based on their ongoing progress and feedback.
In a virtual online class, have these conversations using private chat. In a face-to-face class, find regular moments for unintimidating, private conversations.
Clear the floor – literally and figuratively!
Literally, clear the floor
In face to face training:
- Ensure the floor space between the entrance to the training room and participant seating is free from any obstacles or clutter. This will benefit everyone, and especially participants with a vision impairment or people using a mobility aid.
- If you have participants who use wheelchairs, organise desks with no chairs in front of them, so they can easily move the wheelchair into place. If available, provide an adjustable height table.
Figuratively, clear the floor
Figuratively, the notion of ‘clearing the floor’ simply means removing any unnecessary clutter that may hinder participants with disability from accessing the learning. Some examples of clutter include:
- onerous enrolment processes
- hard-to-access learning materials
- transport to the training venue and accessing the training room (face-to-face training)
- gaining the tools and digital skills needed to engage in technology-assisted learning.
Make your activities accessible
Here are some simple ways to modify common training activities so they are more accessible:
Accessible brainstorms or design-thinking exercises
Participants with vision impairment may not be able to read or write on whiteboards or post-it notes, as is often required in brainstorms or design-thinking-based activities. Participants with hearing impairment may struggle to hear and contribute ideas when brainstorming in large groups.
A simple way for all participants to engage in a brainstorm is to have participants work in pairs or groups of three (no larger, if possible). This way, the participants with disabilities can contribute and use the complementary skills of their partner/s to complete the activity.
Presenting information and managing visual aids
Research tells us that we absorb new information best by combining spoken word with image, rather than by using spoken words with written words.

However, when you have participants with vision or hearing impairments, these rules change.
Participants with vision impairment
- Describe all visual aids or cues used—images on a slide, what you are drawing on a whiteboard, or what you are demonstrating.
- If you distributed a Word version of a workbook for sight-impaired participants ahead of time, reference where you are at in the workbook by title, rather than by page number.
Participants with hearing impairment
If the participants with hearing impairment use lip-reading as a tool, speak clearly, facing them. In face-to-face training, ensure participants with hearing impairments are seated in the centre of the room. This way you don’t draw undue attention to them when you turn to face them when speaking.
If the participants with hearing impairment do not use lip-reading as a tool, you may need to add more detail to your slides than you normally would. Alternatively, you could:
- develop a customised version of the slides for participants with hearing impairment – add detail to these slides that matches the information you will share verbally – give this to participants with hearing impairment ahead of time and encourage them to refer to these detailed slides while you project the less detailed slides to the rest of the class
- (in virtual classrooms, webinar rooms or pre-recorded sessions) enable closed captions and record transcripts – see the blog post, Five easy steps to more universal design for a simple example of how to do this.
Small adjustments you make to your learning activities can make a big difference to participants with disability.
Training materials & products
A great starting point
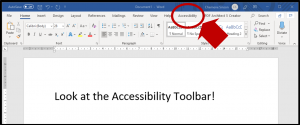
Have a look at Five easy steps to more universal design. This post has some useful starting points for designing accessible materials and explains the function of screen readers, which visually-impaired participants often rely on to read and interpret learning materials.
Here are some more tips:
Increase accessibility of workbooks
When preparing for my Train the Trainer program, I used MS Word to modify the workbook for the participants with vision impairment. Here’s what I did, on advice from them:
Remove graphics or help screen readers understand them
Here are some options to make graphics work better for participants with vision impairment:
- Remove the graphic and replace it with text that explains the information conveyed by the graphic (easiest to read)
- Or, if you must keep the graphic, make it easier for a screen reader to interpret – two ways to do this are: 1) add Alt Text or use the Alt Text function to mark the graphic as ‘decorative’; 2) give the graphic a file name that summarises its content.
Replace tables with text
In MS Word or equivalent, we use tables to make content easier to read and to appear nicely on a page. But screen readers don’t read tables easily! So, to make your materials more accessible, convert any tables in your standard learning resource to text. If you must use a table, don’t merge cells.
Use document styles
Screen readers recognise document styles—Heading 1 for major section headings, Heading 2 for sub-headings, and so on. Use styles consistently throughout your document. This will make it easier for screen readers to do their job.
Distribute a Word version of your workbook
If possible, set up your workbook ahead of time and send it to the participant/s with vision impairment so they can read it ahead of time and bring it to class. Word is preferable to pdf or hard copy because:
- most sight readers can more easily read Word documents than pdf documents. Although some screen readers can read pdf content, Word is easier.
- participants can add personal notes if using a Word version of a participant workbook.
Use the Web Content Accessibility Guidelines (WCAG)
WCAG is a set of internationally-used guidelines to help developers develop accessible online content. If you develop resources, use these guidelines to help you create more universally-designed resources.
In summary
If you remember nothing else, remember our first tip: when in doubt, ask! Participants with disability are the most authoritative experts on their own needs. If you ask, they will tell you what they need, and we’ll all have an insightful learning experience as a result!